Changing nameservers is essential for pointing your domain to the correct hosting. Here's how to do it from the Turbo Host panel
1 - Access the Customer Panel
Go to the link: https://my.turbo.host/sign-in
Log in with your customer credentials (registered e-mail and password).
2 - Access your domains
In the home panel, click on “My Domains”.
Locate the domain you want to set up and click on the “Manage” button.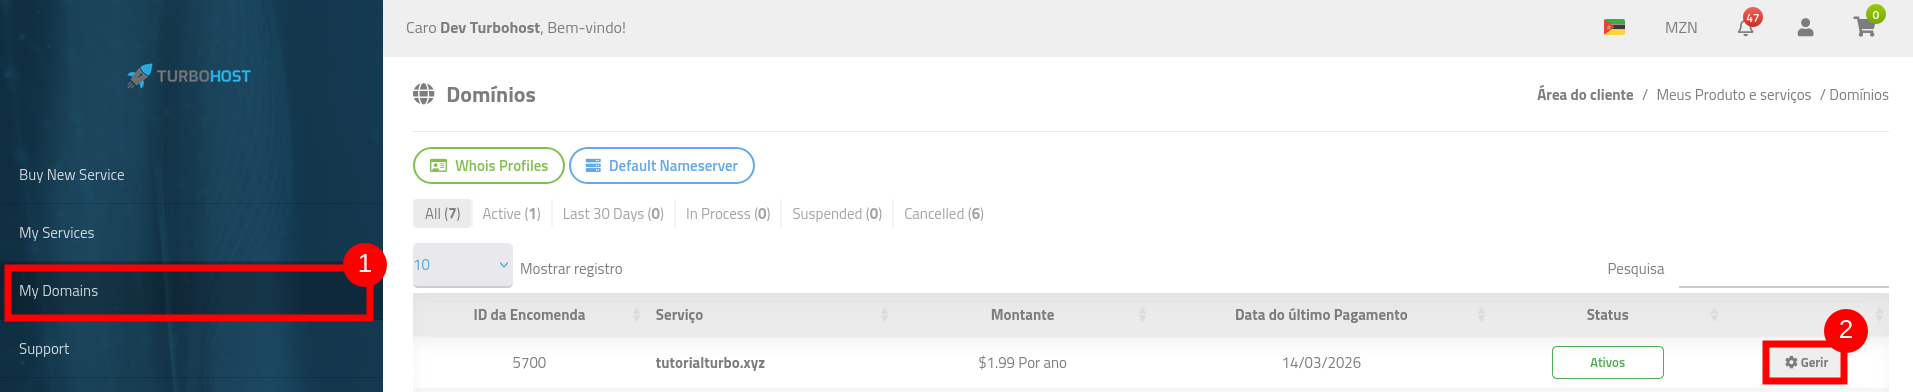
3 - Access DNS Management
Within the domain management area, click on the “DNS Management” option.
This section allows you to change nameservers manually.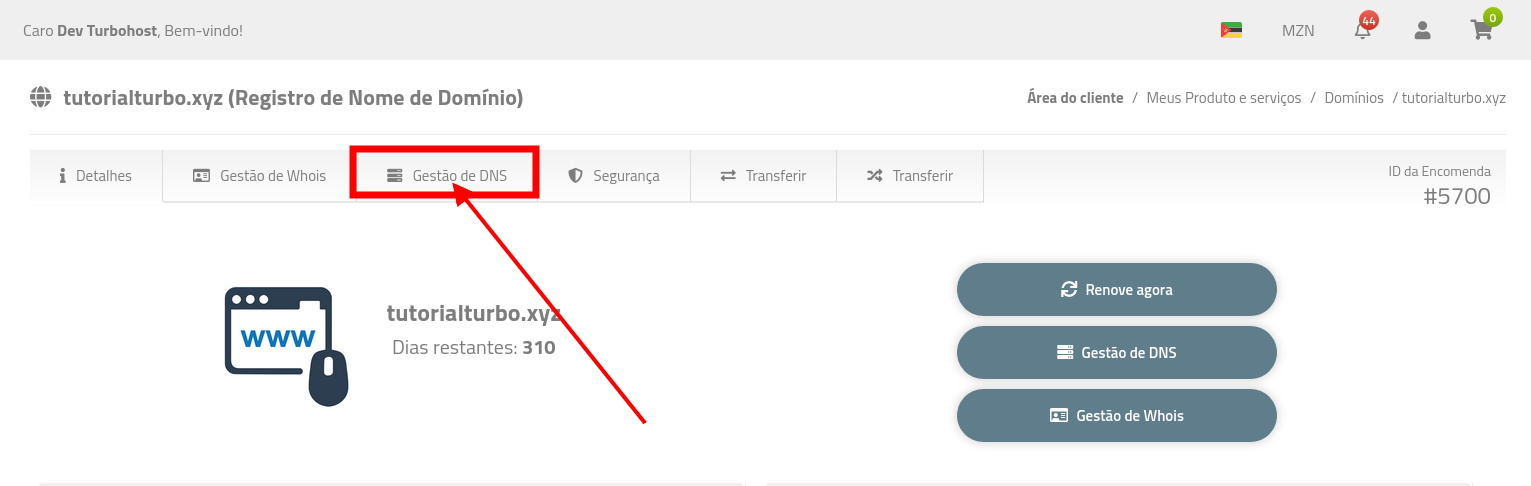
4 - Enter the Nameservers
Enter the nameservers provided by your hosting company.
Usually, there are two nameservers (example: ns1.exemplo.com and ns2.exemplo.com).
In some cases, there may be three or even four fields - if you have more than two nameservers, fill in all the available ones.
Once you've filled them in correctly, click on the “Update DNS” button.
NB: As alterações serão salvas e podem levar de 15 minutos até 48 horas para se propagarem totalmente na internet (propagação DNS).
- Durante esse tempo, o domínio pode não funcionar corretamente — isso é normal.
") Worldwide (English)
Worldwide (English)") Mozambique (Portuguese)
Mozambique (Portuguese)